DIY 2nd Manual for my Nord Stage 2 SW - self-made
Posted: 31 Jul 2020, 20:29
Hello together,
I just wanted to inform you on my project I have executed the past 16 months. It took me so long because at the time when I worked on it a year ago, I fell down the stairs, ripped both my patellar tendons and could not walk properly for months (actually 3 days before an own concert, and two weeks before Creedence Clearwater Revival performed in my hometown in Germany). I have a NS2 SW73 and I liked to have a second keyboard for piano action. I had bought a Studiologic VMK-161 Plus (Piano Action with metal hammers, 61 Keys - perfect for me) but I didn't like its plastic case plus the fact I needed two tiers on a keyboard stand having to find the right adjustment - I hate gaps between instruments...
So I butchered my Studiologic and kept the keybed, bought some MDF & beech wood, a Doepfer MKE MIDI Controlling unit (around 90 bucks), some cables, connectors, a wireless phone charging spool and put everything together. As I'm no carpenter but work in finance, it took me quite some time to figure everything out and put everything together.
The material cost is really limited - at the Home Depot store MDF and beech wood is quite cheap, highest investment was for tools that I didn't use before (for grinding, etc, lacquer), and - to be honest - I needed to throw a lot of stuff away when some steps didn't work out properly at the beginning.
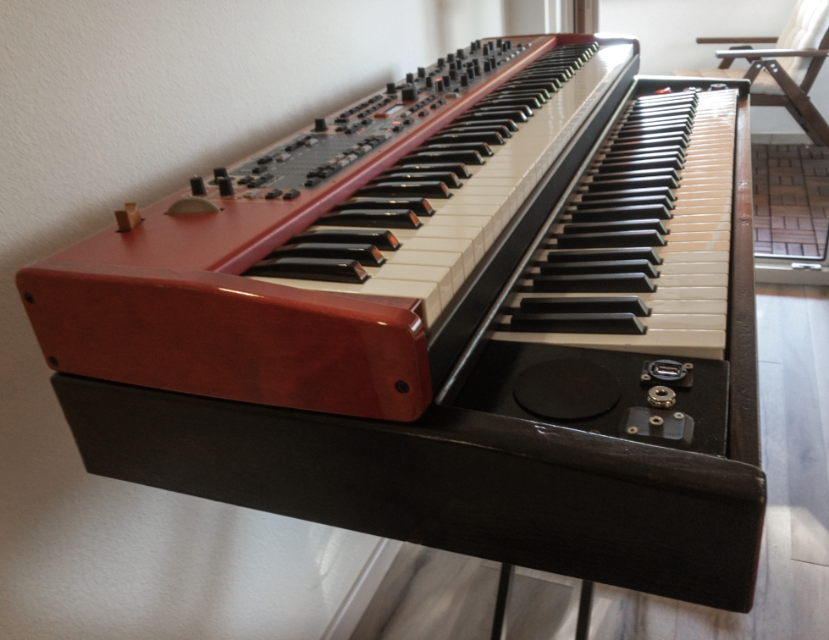
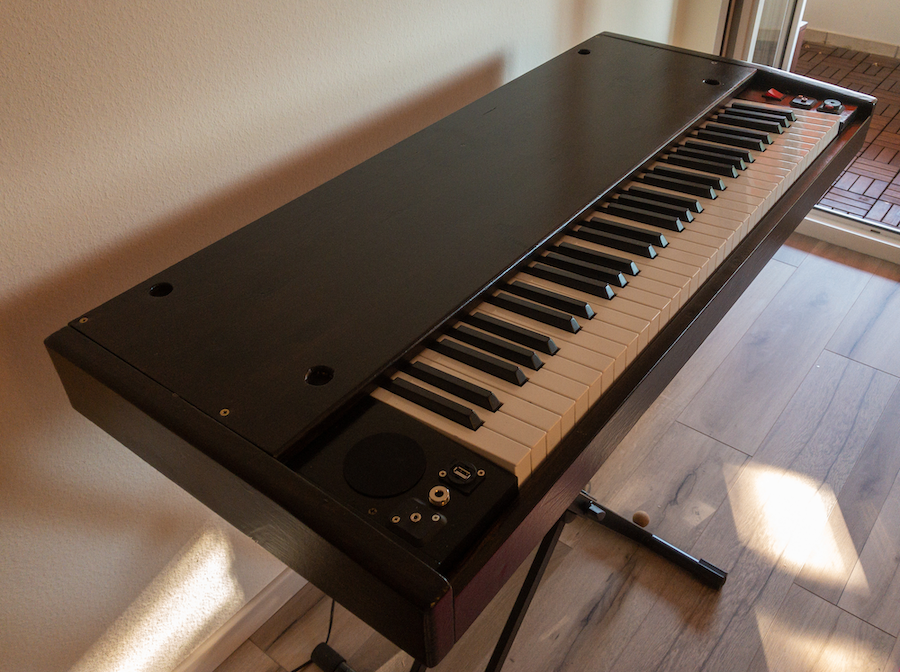
Here is the final result:

Look from the side:
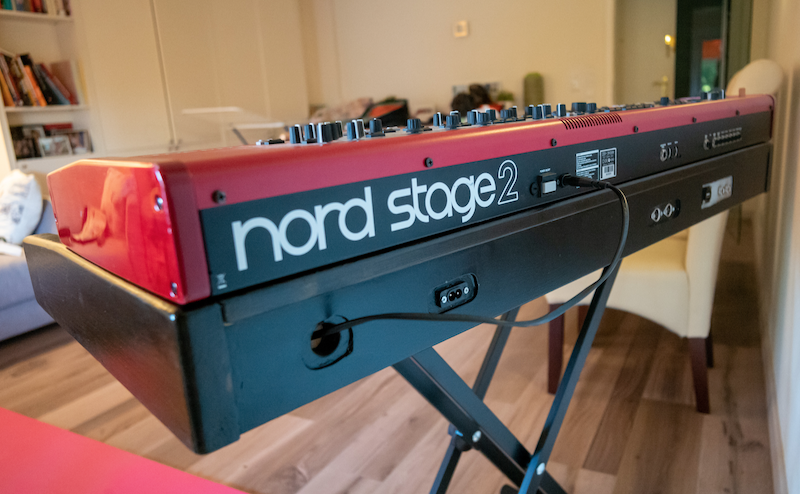
Look from the back:
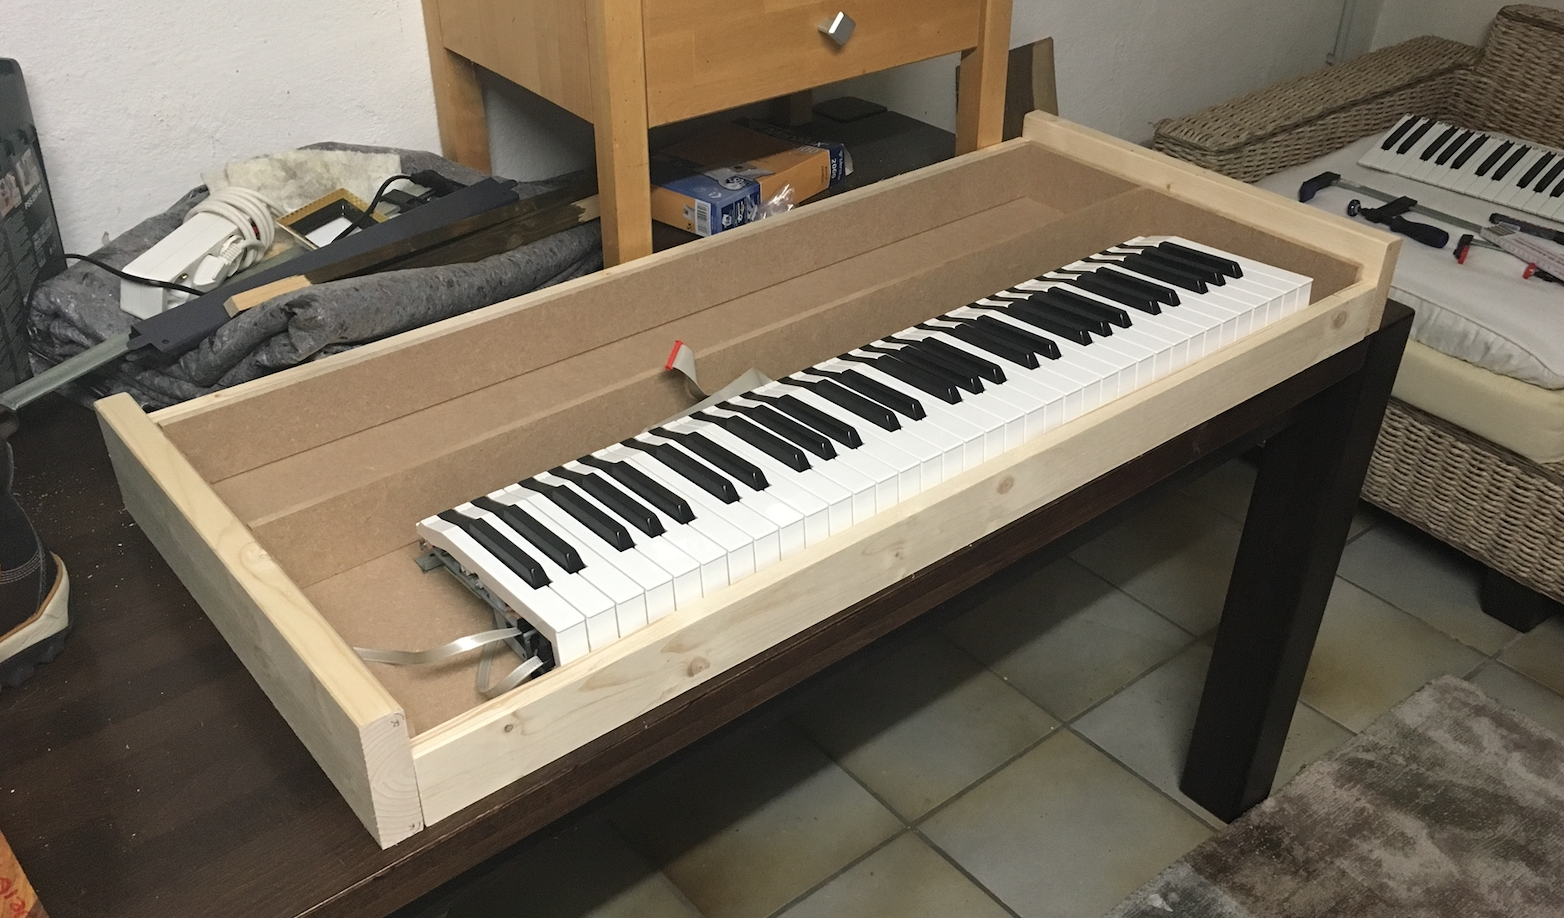
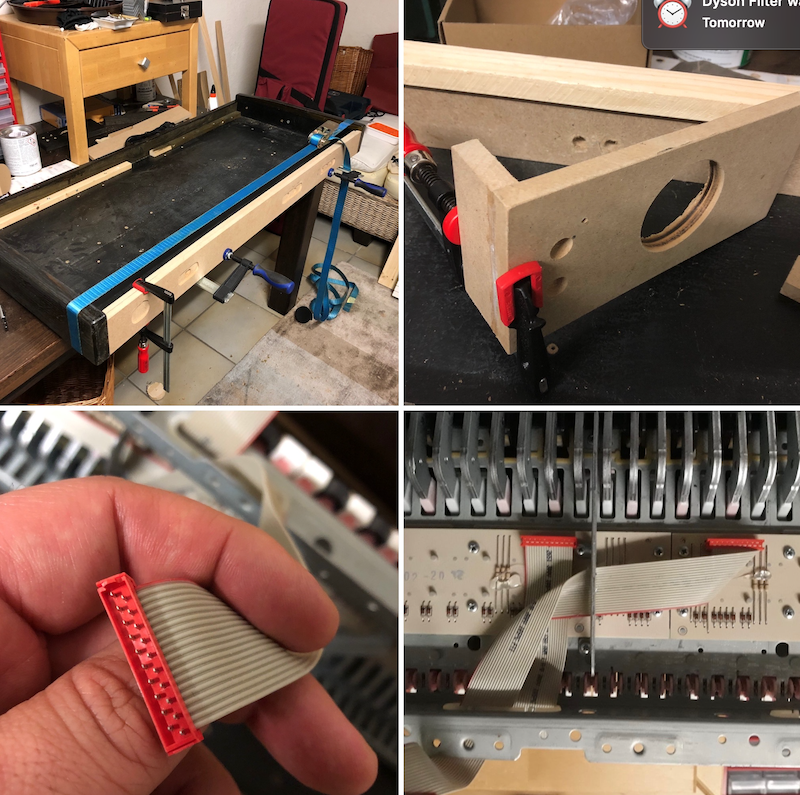
Well, I started by measuring everything and putting the basic case together. I used MDF for the inside frame, for the outside I used beech wood
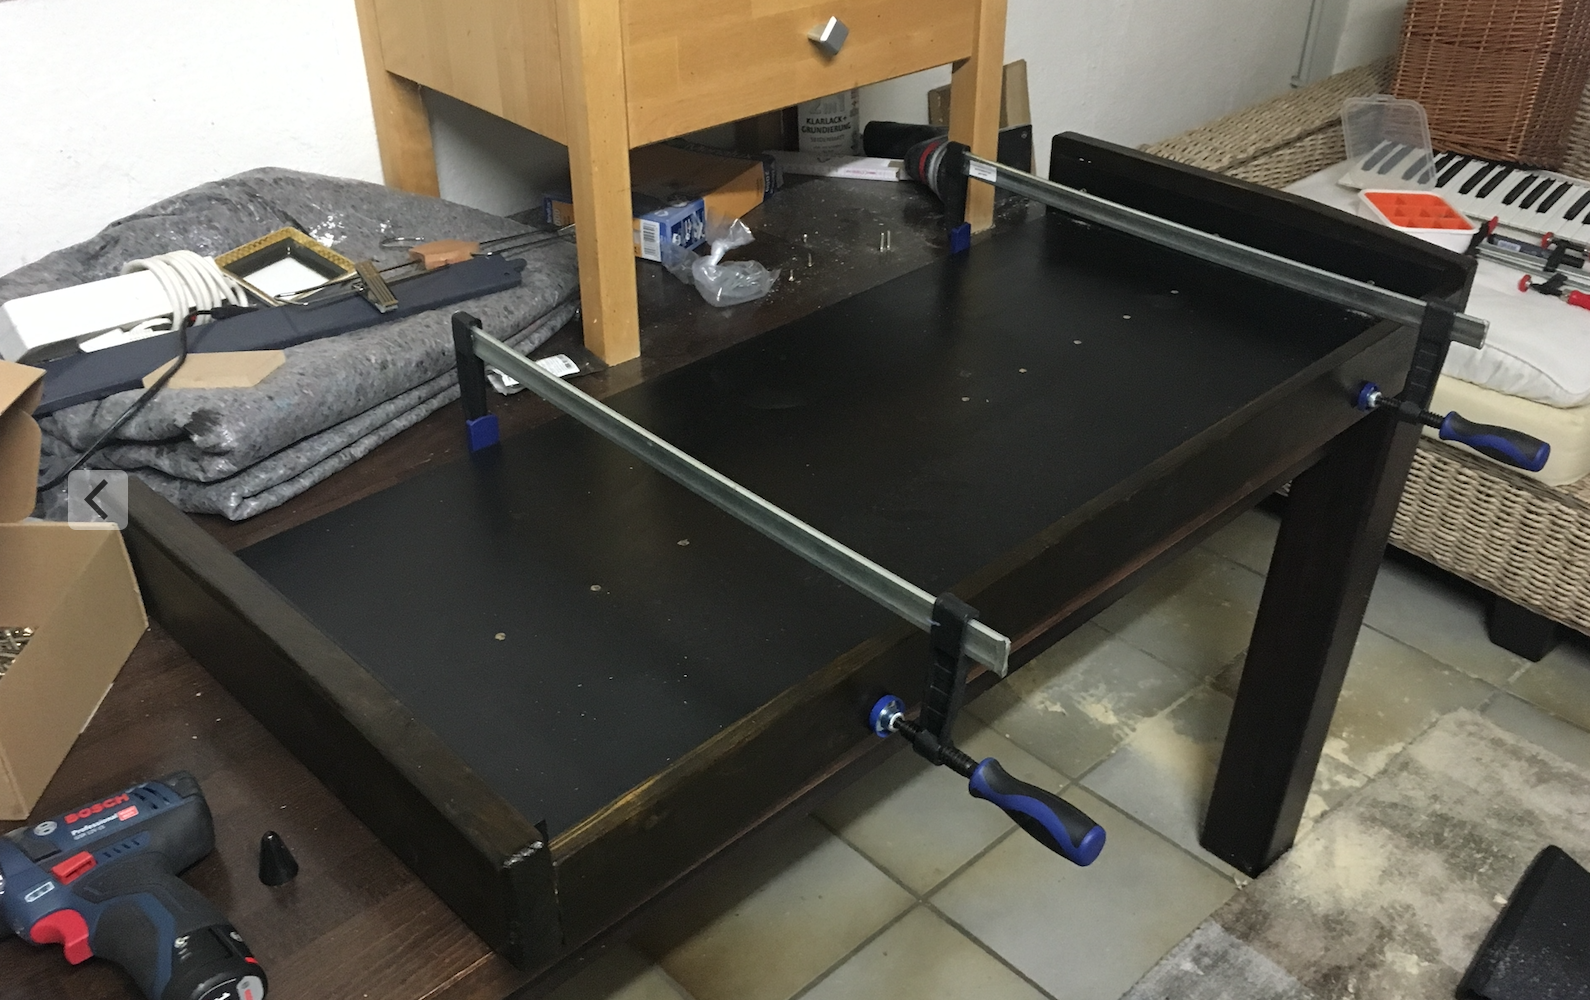
I stained the wood and finished it with a clear paint afterwards:
These are just some images. I connected the MKE MIDI Controller from German modular synth company Doepfer (almost just around the corner, just like Thomann) to my Fatar keyboard which then transmits the messages to the Nord Stage 2 in Dual keyboard mode. What I also did was to install an internal power distribution, a wireless phone charger, a splitter audio-in and headphone plug in the front, which I connected to an IO-/pair at the back of the unit in order to keep the cable salad limited
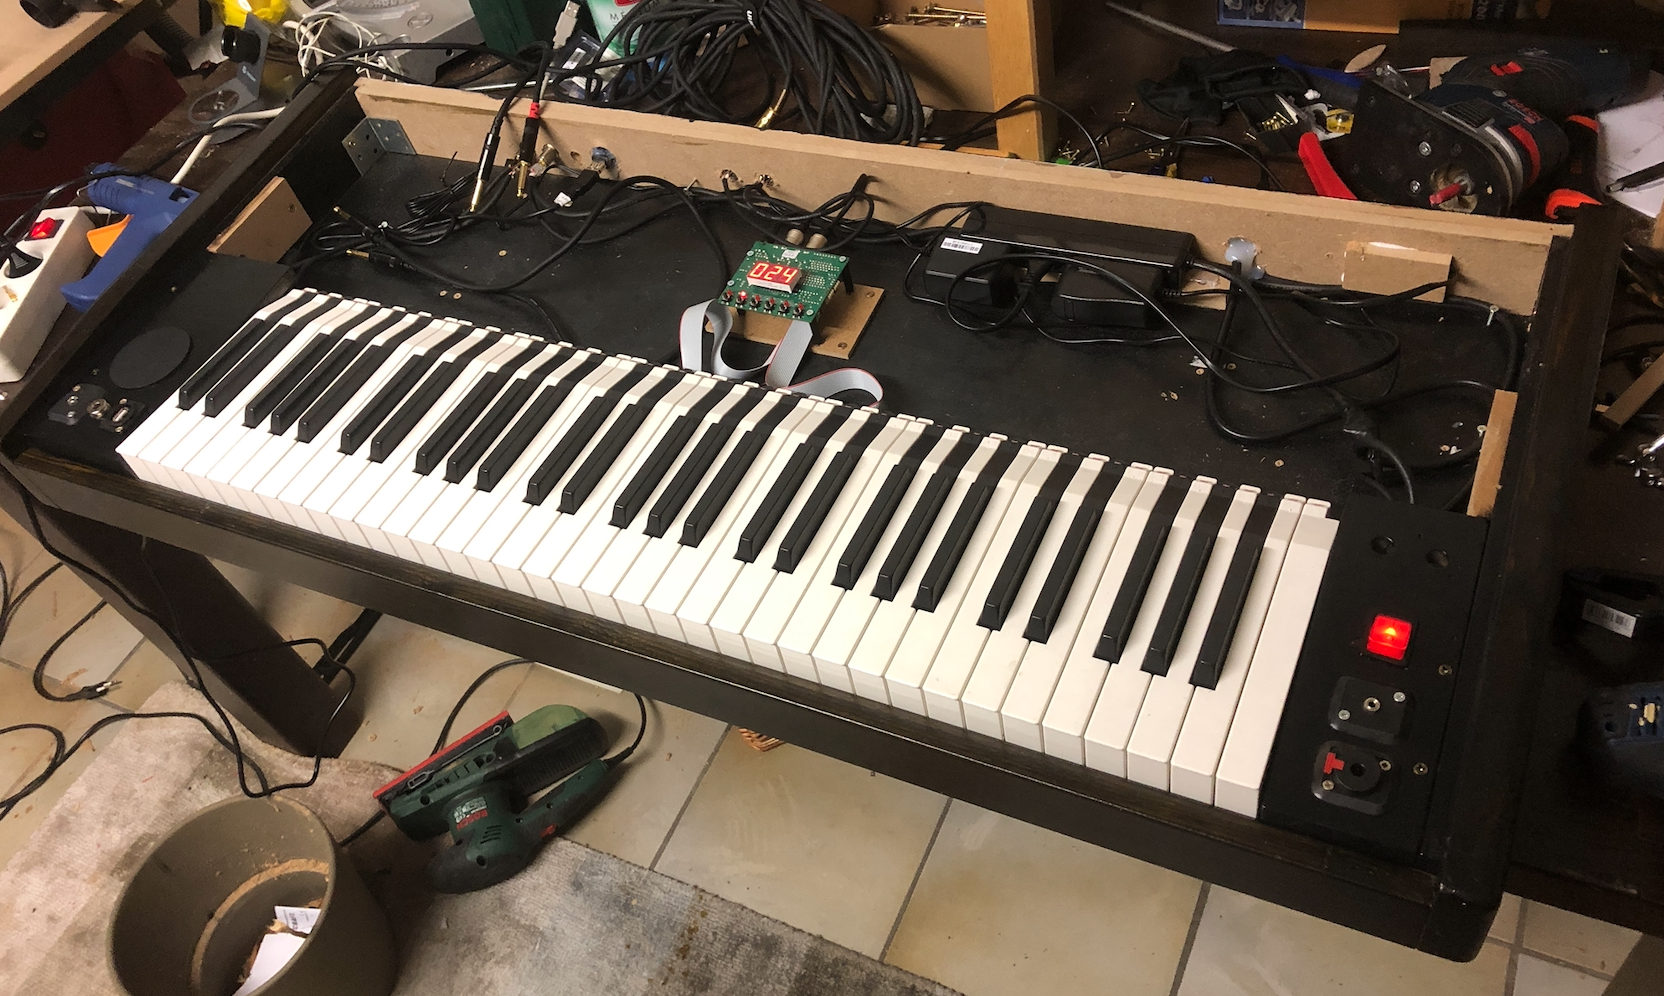
The result without the NS2 on top looks like that:
Well, I have a ton of photos, also from all the wiring, but I think I need to keep it limited not to overwhelm you. A last one:
My conclusions:
1. NS2 is still an amazing keyboard, paired with a second tier in dual mode it's almost perfect
2. Don't underestimate soldering efforts if you want to have optimised cable management.
3. Plan a lot of time for perfectioning work (lacquering, etc) and don't give up if some thing don't work out initially
4. Watch your steps when you walk down the stairs. Could end up in hospital like me with f*cked up knees on both sides and months of invalidity.
To all of you: have a great day.
Christian from Nürnberg, Germany
I just wanted to inform you on my project I have executed the past 16 months. It took me so long because at the time when I worked on it a year ago, I fell down the stairs, ripped both my patellar tendons and could not walk properly for months (actually 3 days before an own concert, and two weeks before Creedence Clearwater Revival performed in my hometown in Germany). I have a NS2 SW73 and I liked to have a second keyboard for piano action. I had bought a Studiologic VMK-161 Plus (Piano Action with metal hammers, 61 Keys - perfect for me) but I didn't like its plastic case plus the fact I needed two tiers on a keyboard stand having to find the right adjustment - I hate gaps between instruments...
So I butchered my Studiologic and kept the keybed, bought some MDF & beech wood, a Doepfer MKE MIDI Controlling unit (around 90 bucks), some cables, connectors, a wireless phone charging spool and put everything together. As I'm no carpenter but work in finance, it took me quite some time to figure everything out and put everything together.
The material cost is really limited - at the Home Depot store MDF and beech wood is quite cheap, highest investment was for tools that I didn't use before (for grinding, etc, lacquer), and - to be honest - I needed to throw a lot of stuff away when some steps didn't work out properly at the beginning.
Here is the final result:
Look from the side:
Look from the back:
Well, I started by measuring everything and putting the basic case together. I used MDF for the inside frame, for the outside I used beech wood
I stained the wood and finished it with a clear paint afterwards:
These are just some images. I connected the MKE MIDI Controller from German modular synth company Doepfer (almost just around the corner, just like Thomann) to my Fatar keyboard which then transmits the messages to the Nord Stage 2 in Dual keyboard mode. What I also did was to install an internal power distribution, a wireless phone charger, a splitter audio-in and headphone plug in the front, which I connected to an IO-/pair at the back of the unit in order to keep the cable salad limited
The result without the NS2 on top looks like that:
Well, I have a ton of photos, also from all the wiring, but I think I need to keep it limited not to overwhelm you. A last one:
My conclusions:
1. NS2 is still an amazing keyboard, paired with a second tier in dual mode it's almost perfect
2. Don't underestimate soldering efforts if you want to have optimised cable management.
3. Plan a lot of time for perfectioning work (lacquering, etc) and don't give up if some thing don't work out initially
4. Watch your steps when you walk down the stairs. Could end up in hospital like me with f*cked up knees on both sides and months of invalidity.
To all of you: have a great day.
Christian from Nürnberg, Germany
 That's a excellent work you have done there, and you are not a carpender....But why didn't you paint the woods red to match with the stage above?